

How to Change your own Motor Oil..
Step-by-Step Oil Change Instructions.
There are really two kinds of people, those who change their own motor oil and those who have someone do it for them. Both are fine options. If you have decided to roll up your sleeves and join the DIY multitudes, here are some handy tips for changing your oil.
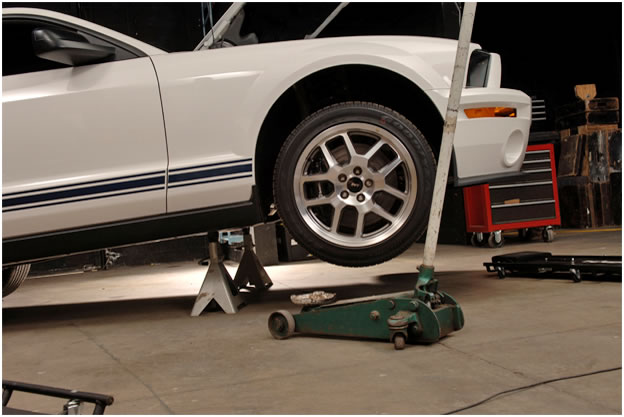
1. Park vehicle on level surface, engage parking brake and turn off engine. If necessary, raise front of vehicle by driving it onto a ramp or by jacking it up and supporting it with jack stands.
CAUTION: NEVER GET UNDER A VEHICLE SUPPORTED ONLY BY A JACK! WE ALSO RECOMMEND WHEEL CHOCKS TO HELP PREVENT WHEELS ON THE GROUND FROM ROLLING.
2. Open hood.
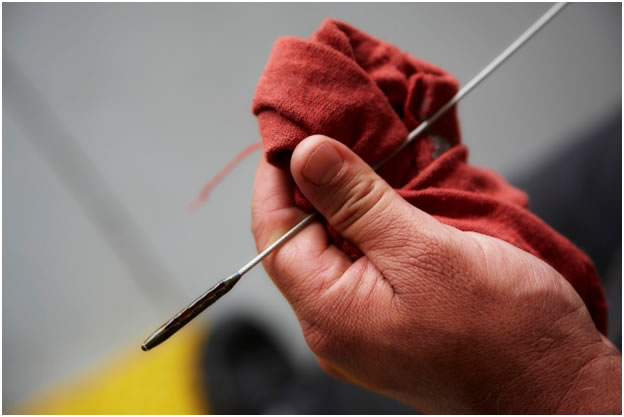
3. Locate engine oil dipstick and remove (helps oil flow when draining).
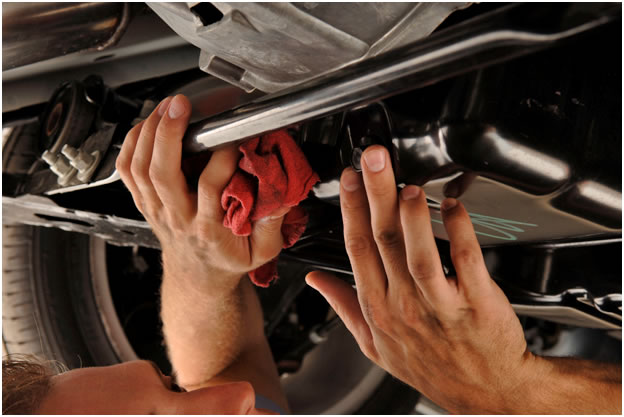
4. Once vehicle is safely and securely supported, put on safety glasses, crawl under vehicle and locate engine’s oil pan. (See owner’s manual for reference.)
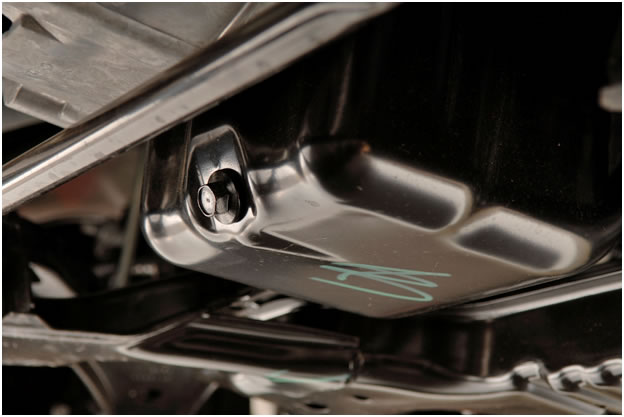
5. Locate oil drain plug, which is a long bolt head at bottom of pan. The drain plug allows the oil to drain out of the pan. (Note: Some vehicles have two drain plugs.)
6. Position a container, such as an approved oil catch pan, under drain plug. Make sure the catch pan is large enough to hold the volume of oil expected to drain out of the engine. Check your owner’s manual for the volume of oil that you car requires.
7. Loosen drain plug using box-end wrench or 6-pt. socket. Carefully remove plug by hand, making sure catch pan is underneath plug hole. Oil will flow rapidly from hole, but allow several minutes for all old oil to drain out. (See vehicle owner’s manual for additional information.) CAUTION: OIL MAY BE HOT!
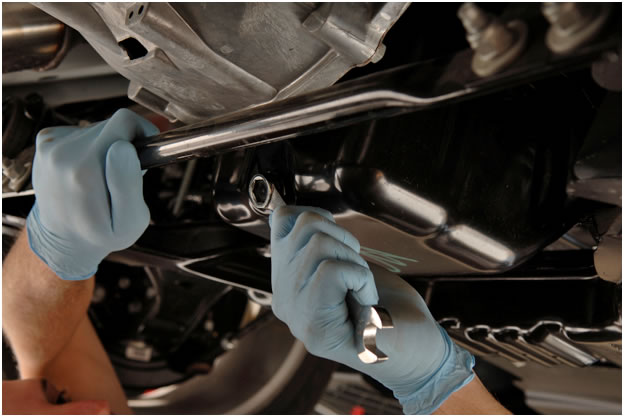
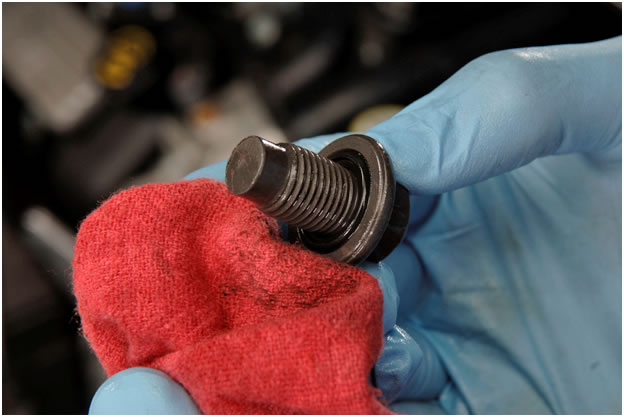
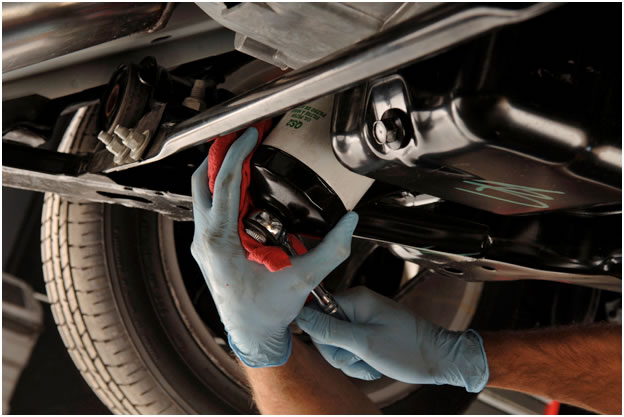
8. Wipe the oil pan threads and oil drain plug with a rag and visually inspect the condition of the oil pan and oil drain plug threads and gasket. Buy a replacement drain plug if you have any concerns about the condition of the plug. Replace the drain plug gasket if needed (some OEMs recommend this). Once the oil is finished draining, reinstall the oil drain plug and tighten with the correct box-end wrench or 6-pt. socket to the manufacturer-specified torque. (See owner’s manual.)
9. Locate oil filter. If the old and new oil filters are not the same, double-check the application to be sure you have the correct filter. (See vehicle’s owner’s manual for additional information.)

10. Position oil catch pan under oil filter to catch any residual oil remaining inside filter.
11. Loosen oil filter or oil filter cap with oil filter wrench, and allow oil to drain from oil filter.
12. Remove oil filter. Check to make sure filter gasket has come off with the filter. If it's still clinging to the engine mounting plate, remove it and any remaining residue.
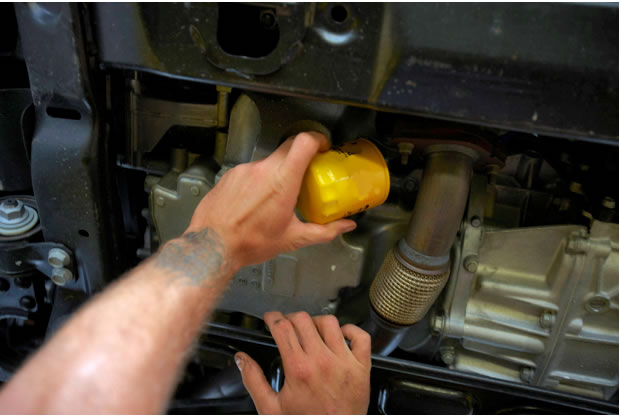
13. Place a light coating of new oil on the gasket of the new oil filter so it will install smoothly onto engine. (Note: Do not use grease!) By hand, install new oil filter onto engine by turning in a clockwise direction. Once the oil filter gasket first contacts the mounting plate gasket surface, tighten filter according to directions for your application (usually found on the new oil filter or oil filter box), preferably by hand. Generally, this is three-quarters to one full turn after the filter gasket contacts the engine. (NOTE: Cartridge oil filter replacement procedures may differ. See owner's or service manual for instructions.)
14. Under the hood, remove the oil fill cap and pour in the correct amount of Motor oil of the correct viscosity with a funnel. (See vehicle’s owner's manual for recommended grade, specification and amount.)
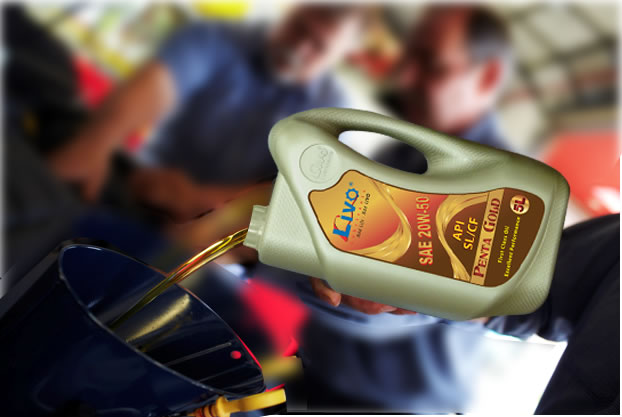
15. Replace oil fill cap.
16. Start engine and run at idle for minimum of 30 seconds. Carefully inspect under vehicle for oil leaks (especially by oil drain plug and oil filter). If leaks are visible, shut off engine immediately and repair leaks.

17. Shut off engine and allow 30 seconds for oil to settle in the engine. Carefully inspect the area beneath the vehicle for oil leaks.
18. Safely lower vehicle to level ground.
19. Install and remove oil dipstick and check for proper oil level, adding more oil if necessary. (See vehicle’s owner’s manual for oil capacity and recommended oil level on dipstick.)
20. Repeat oil change with LIVO motor oil as directed by manufacturer’s guidelines.
These instructions are intended as general guidelines. Please consult your owner’s or service manual for specific instructions on changing the oil and filter on your vehicle. Use extreme caution when lifting or jacking any vehicle.
Oil Change Frequently asked questions.
Is it necessary to use a stabilizer or additive with every oil change?
Nope. Today’s engine oils are formulated to fully protect the engine. They don’t need extra help.
When Should I Change My Oil?
You should change your oil and filter at, or before, the end of the oil-change intervals provided by your vehicle’s manufacturer. These intervals are based on mileage or time. By doing this, you can help keep your engine oil in good condition and provide the best protection for all your components.
How Should I dispose of my old oil after an oil change?
Used oil can pollute the environment and should never be poured down the drain. You can drop off old oil and oil filters at your closest oil change centers to be recycled properly.